Smartphones
Smartphones
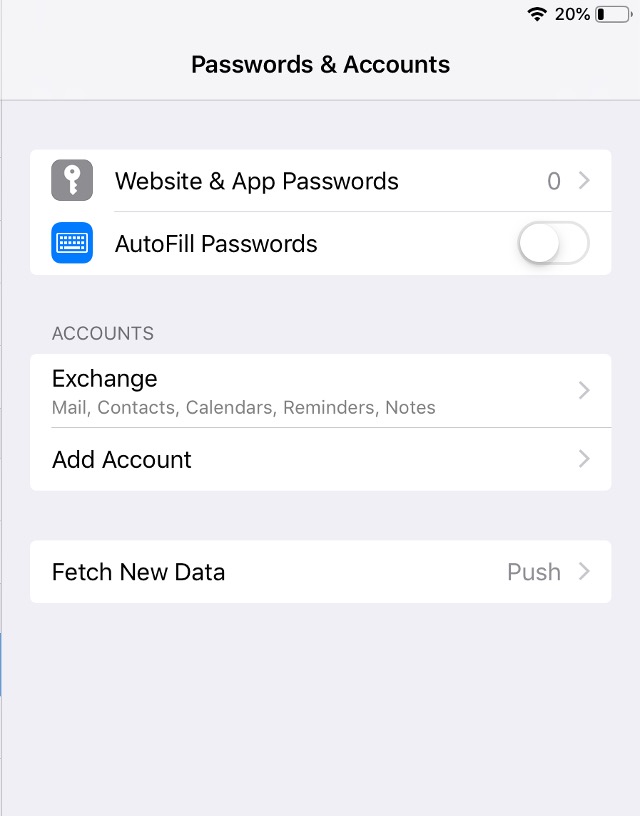
- Go to Settings --> Passwords and Accounts.

- Tap Add Account.
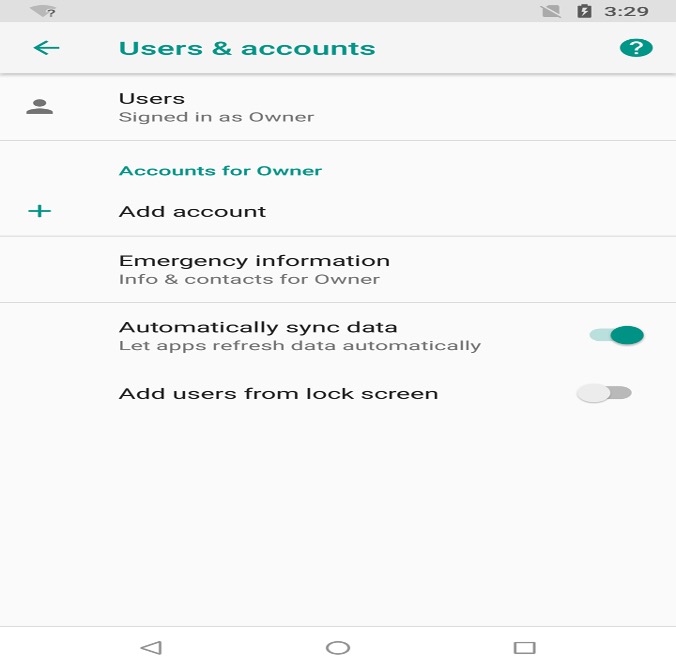
- Tap Microsoft Exchange.

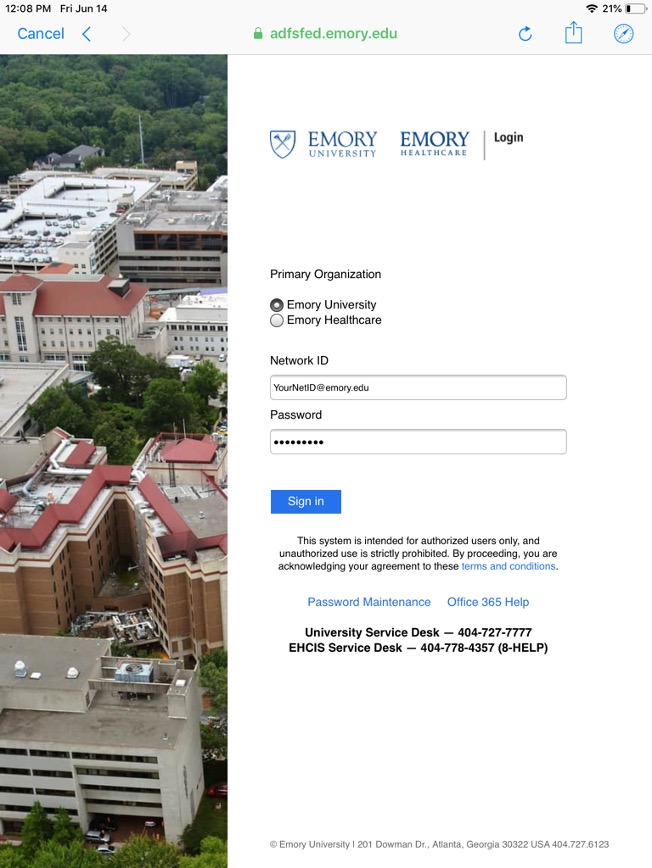
- Sign-in with your NetID@emory.edu - You should be redirected to the Microsoft login page with the 'Work or School', or 'Personal' account options, if not see, 4b. Choose 'Work or School' then sign-in again on with your NetID@emory.edu and password.

- If you did not get the Microsoft Login Page, manually set up your account with the following information:
- Email: EmoryNetID@emory.edu
- Domain: This field can remain blank, HOWEVER If you have issues with continuing with the process, please enter your NetID@emory.edu in the field
- Username: EmoryNetID@emory.edu (NOTE: Be sure to put your full email address)
- Password: <your Emory password>
- Server: outlook.office365.com
- Port: 443
- Description: Leave as 'Exchange', or identify it with 'Emory Email' (If you have multiple email accounts, this description helps to identify each)
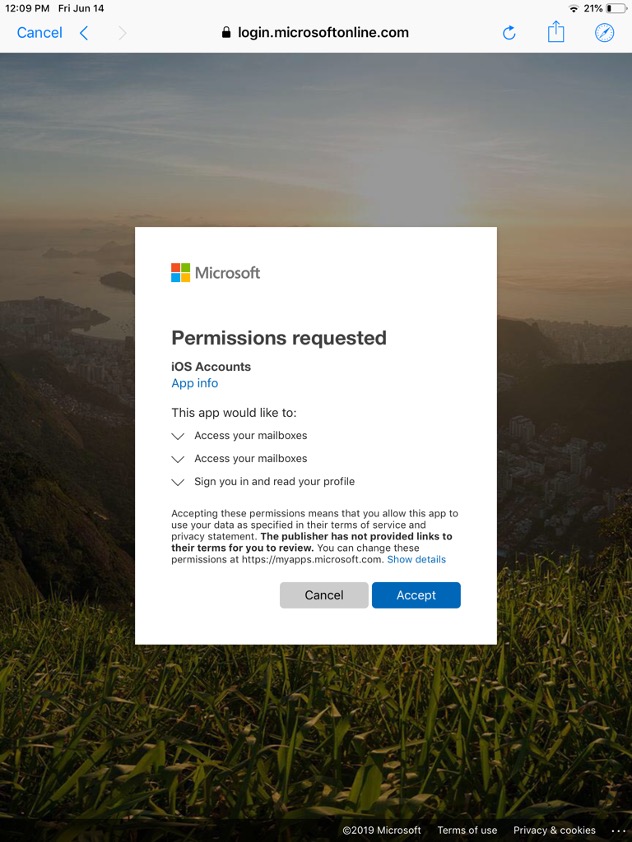
- Accept any permissions that are asked.
- On the Settings screen, select which information you'd like to have synced to your iOS device. Tap Save.

Currently, the built-in email app for Android does not support Modern Authentication. Since Modern Authentication is required to connect to your Emory email account, you will need to connect using the Outlook app that can be found in the Google Play Store. There are other email apps that do support Modern Authentication, but since step-by-step directions will vary among those apps, they will not be listed below.
To set up the Outlook application:
- Download the Outlook app from the PlayStore if you do not already have it.

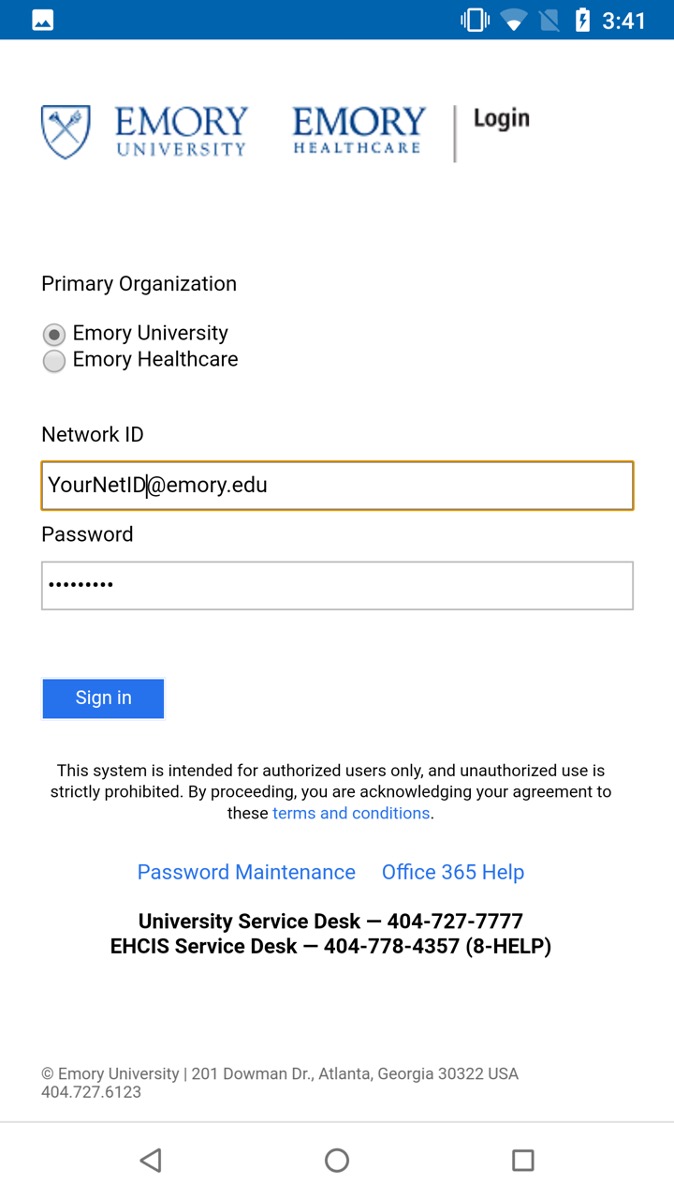
- Sign into your Emory Account with your NetID
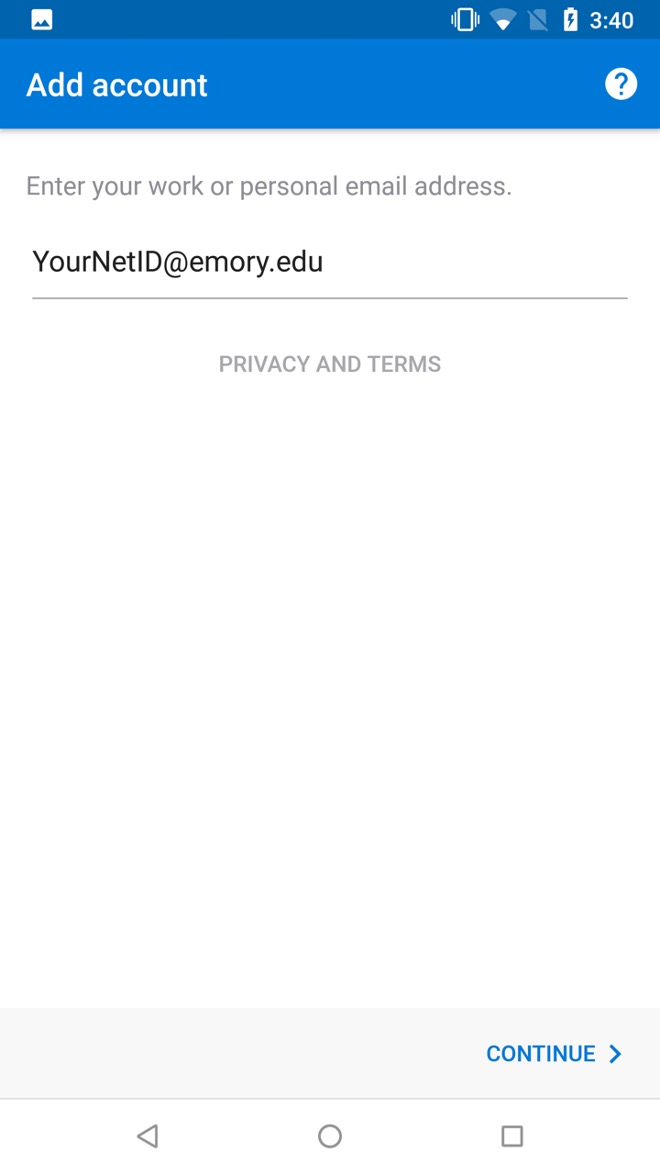
- Sign into the Microsoft Account page with your NetID and password